
I see many gardeners having problems with heavy rainfall, strong winds, and frost. You probably face the same challenges and so did I. But that is because no one told you that even hardy plants can benefit from a little protection to overcome these challenges! So in this (video) blog, I will tell you how you can protect your plants through winter. And you don’t need a big budget or a greenhouse to do so. Let me show you what DIY low tunnel structure we tested for you!
The main reason for me to find a solution was simple. I wanted to grow ranunculus and other plants over winter. Our soil is soggy and our winter weather is terrible. I noticed 2 major benefits of having a low tunnel over the beds.
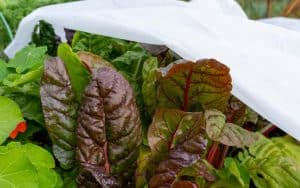
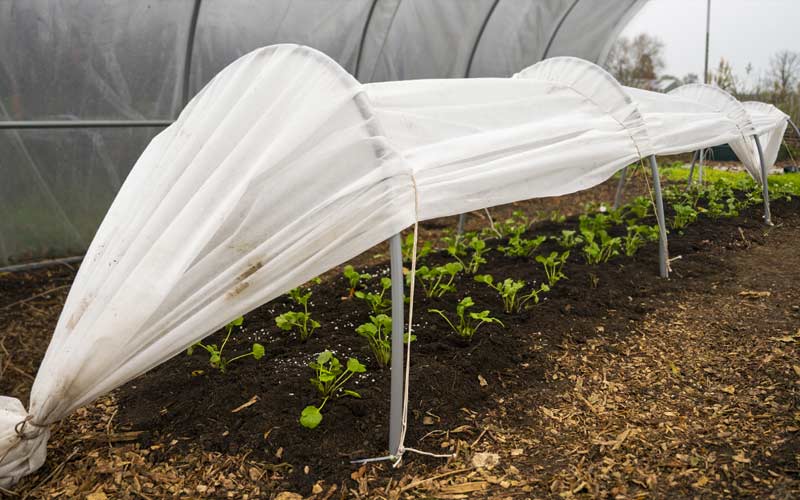
First of all, if you use a transparent foil the sun will warm up the soil. It creates a mini greenhouse and during the day the plants are a bit more comfortable. This extra warmth has a major impact on plant growth. For example, lettuce grows more consistently and therefore we can harvest fresh lettuce even during winter!
Second, when it comes to hardy or half-hardy (moderately frost-resistant) plants like larkspur, orlaya, or ranunculus and anemones you notice plants are performing better, growing bigger, and flowering earlier. It even allows you to grow flowers or vegetables that would otherwise not survive and thrive in your climate.
What you need to know before starting:
The main reason for this specific design is simple. It is very easy to set up, it is very affordable, anyone can buy these materials, and it will not blow away. In my first year of using low tunnels, I had to bike to the garden after every storm or windy night. I had to collect the blown-away tunnel foil and fleece fabric and reconstruct it. Trust me, you don’t want that!
Let’s start with a quick summary of what you will need and what to look out for when building this tunnel system. To start, I use electrical tubing in two sizes: Yellow: 1/2″ (16mm) and Grey: 3/4″ (21mm). The main way this system works is one tube fitting in the other, so be sure to check the diameters of both tubes when you are shopping.
Next, you will need some twine, I know many would like to opt for organic versions like jute or coco. But, it’s good to note that there is quite some tension on the twine and the degradation of organic twine is quite fast when exposed to all the elements. That’s why I went with Nylon.
-
Sale!
Fleece frost protection for plants – 6 x 2 m strong fabric
Add to cart €14.95Ordered now, delivered tomorrow
-
Sale!

Fleece frost protection for plants – 22 x 2 m strong fabric
Add to cart €29.95Ordered now, delivered tomorrow
-
Easy Pop-Up Net plant protection tent – 1,25 x 1,25 x 0,7 m
Read more €39.95Not available
Also, the pegs at the end of the garden bed need to be strong. I went with a short wooden beam and hammered that into the ground. You can also use actual steel pegs or a metal rod for this. As long as it is easy to tie the crop protection to.
Lastly, I use cable ties (ty wraps) at the bottom. You can also opt to use twine for this but the cable ties just make it less likely to slip and they are less likely to tear.
The tools: a metal saw to cut the electrical tubing to size. A hammer to get the tubes and end pegs into the ground.
View the video here
Building the low tunnel
Step 1: Preparation of the garden bed
Before you get to work, prepare your garden bed. Maybe add a layer of compost or plant your plants. It’s easier to add them before the tunnel is in place. Even though the tunnel can easily be opened, it is way easier to maneuver a wheelbarrow without the tunnel in place.
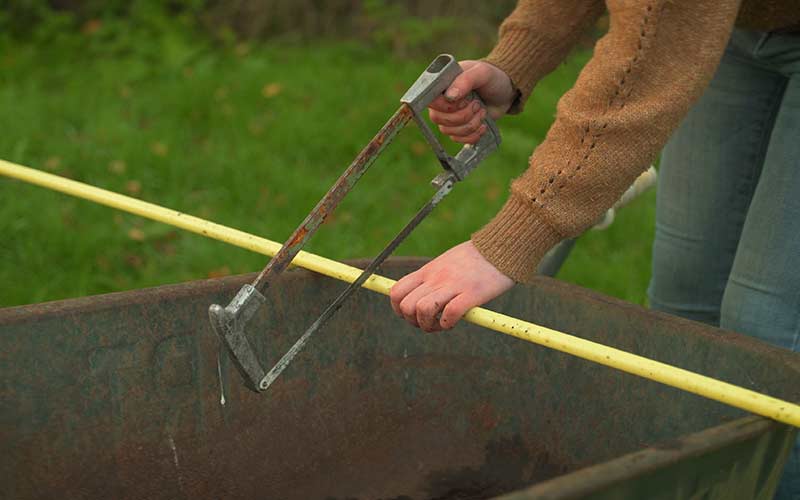
Step 2: Cut the electrical tubing to size
It’s time to get building. The first step is cutting the electrical tubing to size. I’m now referring to the yellow 1/2″ (16mm) tubes. These will go for about 50% underground and 50% above. So I cut them to be anywhere from 60 to 80cm. These tubes will be an important part of the strength of the tunnel.
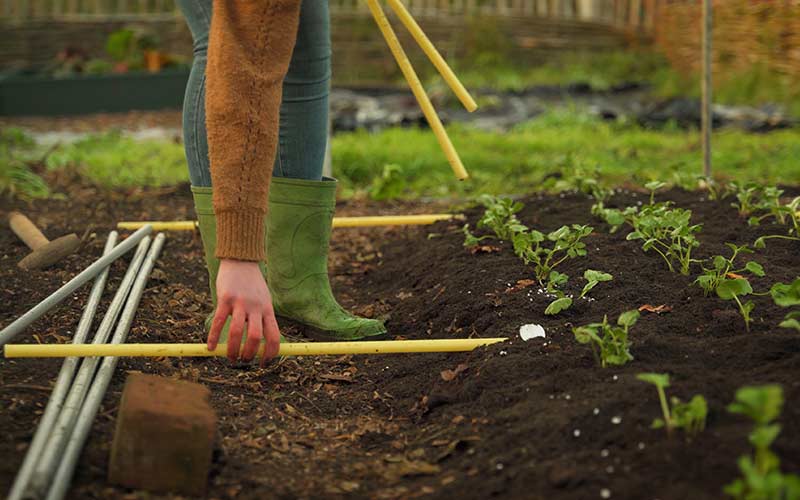
Step 3: Put the tubes in their spot
Next up, hammer the yellow tubes in their spot. I like to first lay them out to get a feel for spacing. You can choose to either go with 1-meter or 2-meter spacing or anything in between. The closer the spacing, the stronger the tunnel will be. But at the same time, you will need more material. If your garden is exposed to strong winds, 1 meter should be a good fit…
Hammer the tubes in the ground leaving a rough 30cm sticking out.
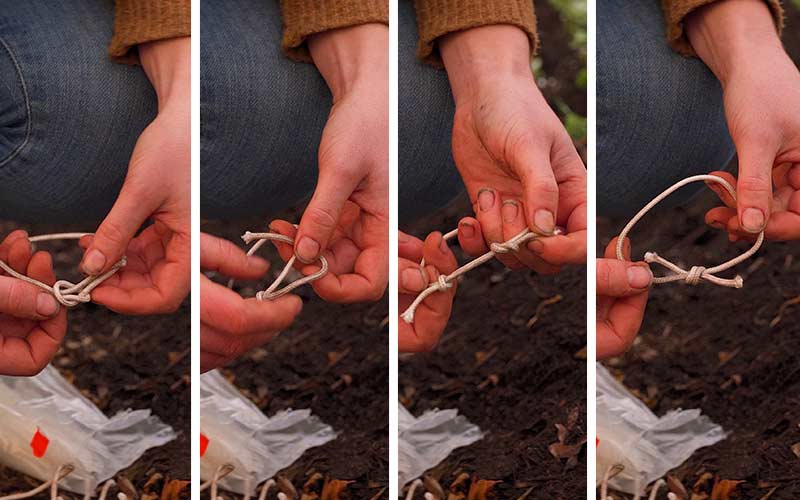
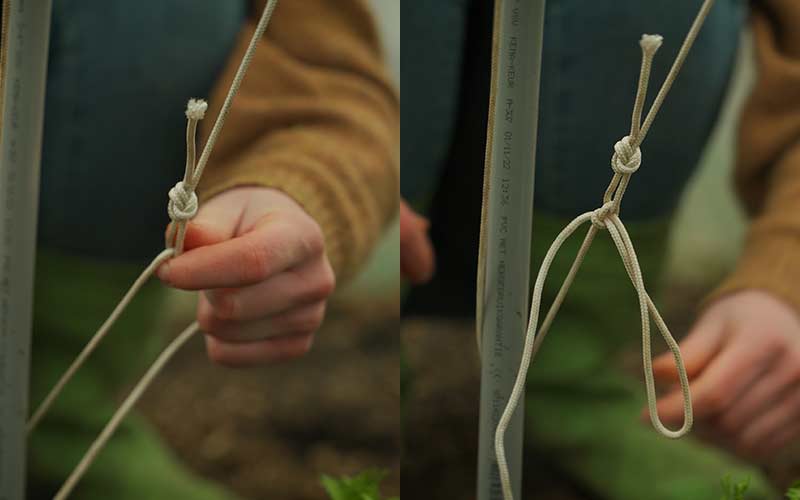
Step 4: Adding the connection for our rope.
A big part of the strength of this tunnel comes from the constant pressure that is created by putting weight down on the lower wire. So it’s important this connection is formed and has no way of coming loose. There is a special knot you can use for this (I think it is called a slipknot). First, cut the rope that you use to about 30 to 40cm. Check out the video above around 3:55 min. if this explanation is not clear. Make a loop and tie one knot on the rope itself. Then with the leftover rope, tie another knot onto itself. Now when you pull on the rope the two knots slide to each other creating a strong loop connecting.
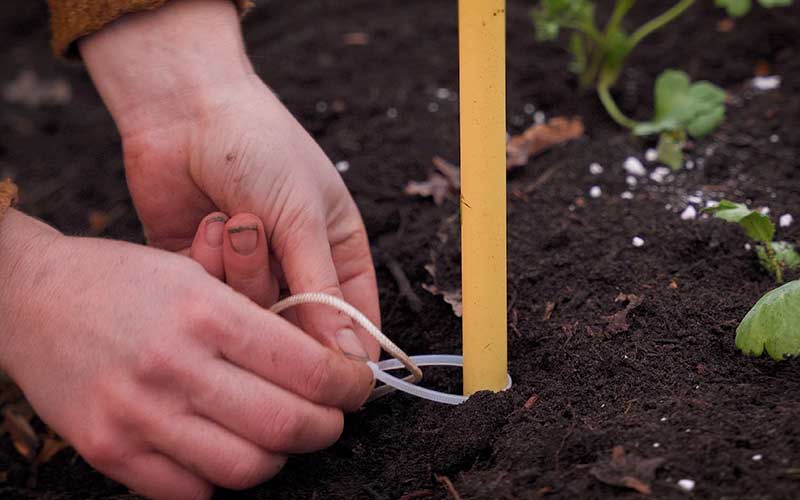
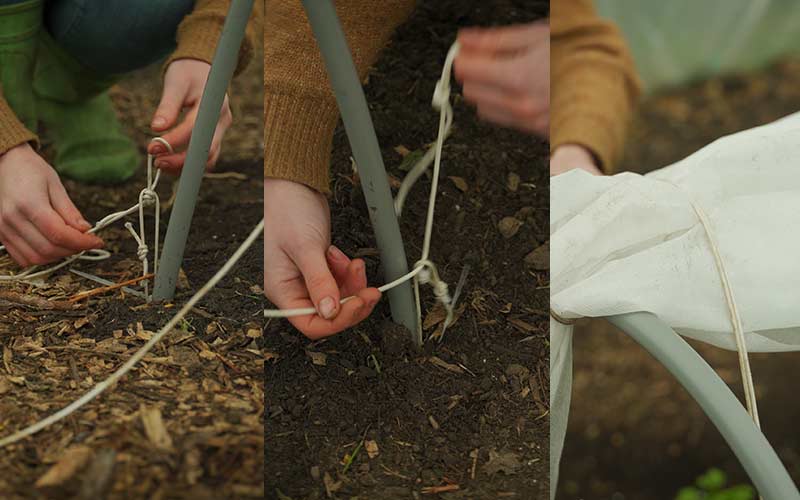
Step 5: Connecting the rope using cable ties (tie wraps)
Now to secure the just-made loop in place, we use cable ties or tie wraps. As mentioned above, you can also use rope for this, but the cable tie makes for a sturdy connection. Connect the loops to every tube in the ground and check if they are no longer able to slide up when applying some pressure. It’s not a big worry if they still move a bit, but some resistance helps with strength.
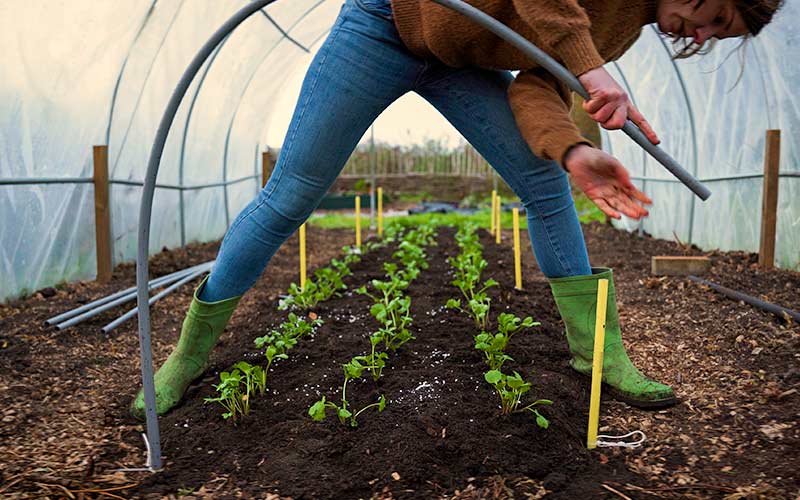
Step 6: Adding the main hoop or loop
It’s time to create the arches on which the crop protection will rest. If everything is right, you can now add the 2-meter grey tubes over the yellow tubes and create the tunnel. Now it’s finally taking shape! Add all of them so the arches are ready. You can use slightly longer tubes if you wish the low tunnel to be higher (for example for brassicas).
Step 7: Add tunnel foil, fleece, or insect netting to your structure
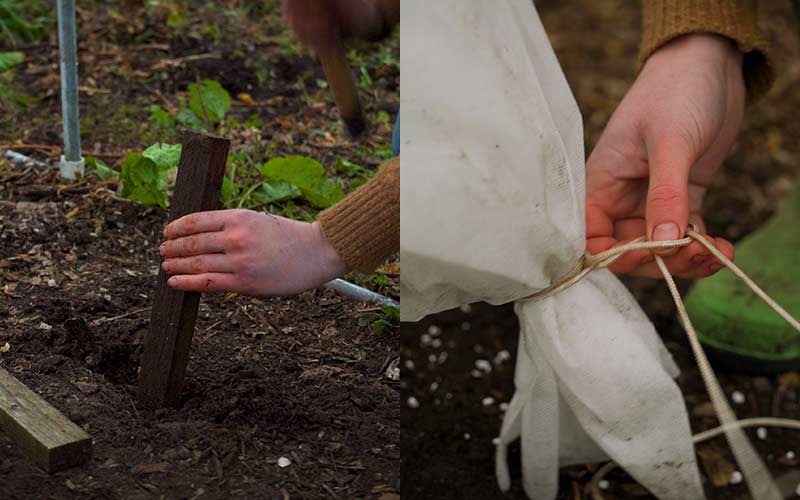
Now that the main structure of your low tunnel is ready, you can move on to the end pegs that will connect your crop protection. As said above, I’m using a piece of wood I had lying around. But you can also use a steel rod or an actual peg. Just make sure it’s strong and doesn’t move.
Next, we cut the crop protection to size and string a piece of rope on both ends connecting them to the pegs.
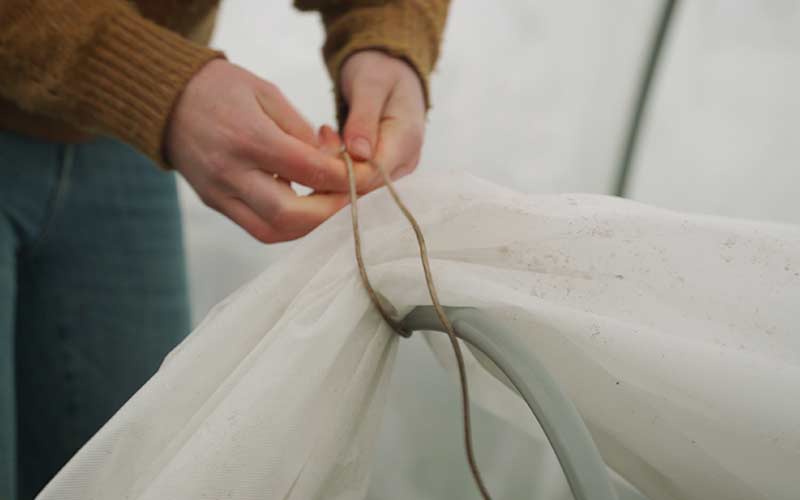
a quick tip: attach the crop protection to the first loop on one side to make the next steps easier.
Step 8: Form the connection using a rope to secure the crop protection
It’s time to secure the crop protection in place using some rope. First, cut the rope to a length of around 3 meters. Then at one end, add a loop. Now we can use this rope to create downward pressure on crop protection.
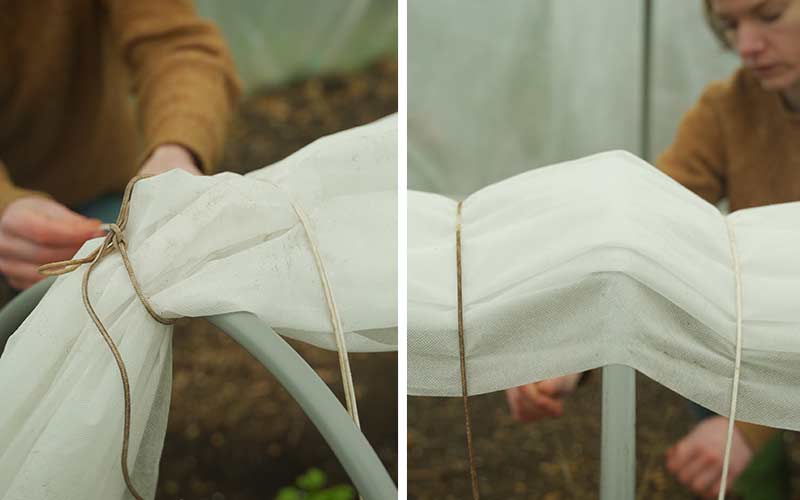
Put the newly made rope through the loop on one side of the bed. Then throw it to the other side and slide it through that loop. Taking the end back to the other side again pulling it through the loop and tying a knot. (image below)
These same steps apply to all hoops you’ve created. But keep an eye on where to place the ropes on the top of the tunnel. For the ends, we put the rope on one side of the crop protection. On the middle arches, we put one rope on each side of the tube.
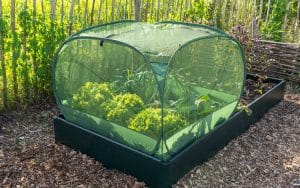
Low tunnel done!
If you’ve followed all steps this is the point where your low tunnel is finished. It might take some extra fiddling around to make sure it’s secure in all places, but once you get the hang of it, setting up and using the tunnel is a breeze.
I hope you will enjoy growing under low tunnels as much as I do. If you have any questions or recommendations, feel free to comment below. Aah, before I forget: during summer I replace the frost cloth or transparent foil with insect netting or I only remove the arches. Create the low tunnels once and you can benefit year-round.
Happy gardening,
Nicole


0 Comments