
Kitchen scraps and leaf waste can be thrown in the green waste bin, but why discard them when you can easily transform them into valuable compost? When done correctly, composting doesn’t emit unpleasant odors, saves you money, and reduces waste. In this blog, we’ll share some practical tips on how to create compost in a compost bin.
Does a Compost Bin in Your Garden Smell?
Anyone can compost at home without causing any disturbances or unpleasant odors in their backyard or on a spacious balcony. A compost bin should not emit foul odors when used correctly. It is designed exclusively for clippings or garden waste, brown cardboard, and cut raw vegetables or fruit. As long as you refrain from adding other items like cooked food or meat, your compost heap will remain odor-free.

Composting in a Small Garden
Even with limited outdoor space, you can still produce compost at home. The compost bin doesn’t have to be large. With just two people, in a small backyard (a terraced house on a 150m² plot), we generate enough waste year-round to fill the standard store-bought compost bin. There’s plenty of vegetable scraps to be found, such as carrot greens, potato peels, and cauliflower leaves. In the summer, we use brown, unprinted, and plastic-free cardboard in combination with green waste. During the autumn and winter, we supplement it with brown leaves and grass. Did you know you can even make compost from mowed grass? So, there’s plenty of green and brown material to work with!
How Do We Make Compost from Leaves and Kitchen Waste?
In the autumn, the streets and parks are covered in leaves. The leaves from the trees in your neighborhood can be composted effectively. To maintain a proper balance of moist green waste and dry brown waste, we add kitchen scraps to the bin in the winter. Chop large pieces into smaller bits to speed up the process.

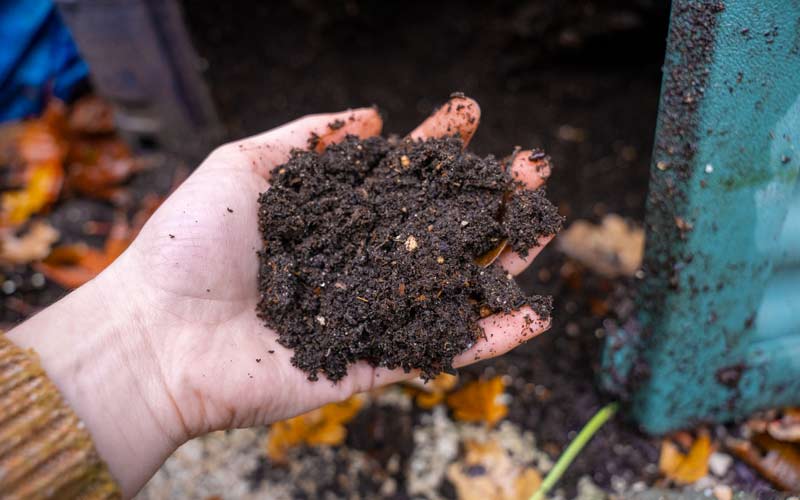
When Is the Compost Ready?
Because we don’t produce much green waste and it becomes significantly smaller during composting, it takes about 7 to 11 months for the compost to be ready. We continuously add fresh waste from the top. Occasionally, we scoop out the mature, dark compost from the bottom via the hatch. This compost is ready to be used in your garden or vegetable plot. The composting process is much faster during the summer months when it’s warm. The soil organisms are more active, and we provide them with more food.

Tips for Successful Composting
The best advice I can offer is not to ad seeds to the compost. So, avoid tomatoes, bell peppers, spent flowers, or any weeds with seeds or roots. The reason is simple: the compost bin is too small to generate heat. Normally, a good mix of brown and green garden waste generates heat. The temperature can even reach 70 degrees Celsius. The heat kills all seeds and pathogens.
Ensure proper aeration, moisture, and variety in your compost heap. This promotes the composting process and yields higher-quality compost.
If you have plenty of space and a large garden, consider creating a larger compost pile. The advantage of a larger compost bin is that it allows you to generate heat, which kills seeds and pathogens. You don’t need to be as specific about what you add to the compost.
Following these four simple steps, you can easily create perfect compost on your own
Step 1: Mix Brown and Green Materials
To initiate the composting process, you should layer green and brown materials.
Examples of brown materials include dry leaves and branches, straw, sawdust (only from natural wood), wood chips, or clean and brown cardboard. This material is carbon-rich and airy.
Examples of green materials include grass clippings, manure, fresh green garden waste, and fresh kitchen scraps. This material is nitrogen-rich and moist. If your compost is too wet and smelly, you’ve added too thick a layer of green material.
Step 2: Covering
Ensure you have a roof and walls to retain moisture and heat, preventing the compost heap from drying out, getting too wet, or cooling down too quickly. If you’ve purchased a ready-made compost bin, this step may not be necessary as the bin is already enclosed.
Step 3: Moistening
Monitor the moisture level of your compost heap and add water if necessary. If the compost feels very dry and lacks life, it’s time to moisten it.
Step 4: Turning
If you have a large compost pile, you’ll need to turn it over once in a while. You can do this with a pitchfork. Typically, this should be done after a few months. You’ll know it’s time to turn the compost when the temperature reaches around 60 or 70 degrees Celsius and starts cooling down. If the temperature doesn’t rise, your compost’s ratio may not be ideal. While you don’t have to turn cool compost, it does speed up the process.
A small compost heap, fortunately, doesn’t require turning.
By following these steps, you can create perfect compost that benefits both your garden and the environment.
Happy composting!
Nicole